Tuesday, August 30, 2022

Layered Stamping with Altenew

Hey there!

Ruchi here and thank you so much for stopping by!

I am back to blogging and sharing some projects which I’ve created for Altenew Educator Certification Program (AECP)

In this post, I’m sharing a few cards & bookmarks, created for my Altenew Academy Level 1- All About Layering 4 course. Inspired by all the classes I’ve joined, and sum up a few techniques in my craft. Have a look.

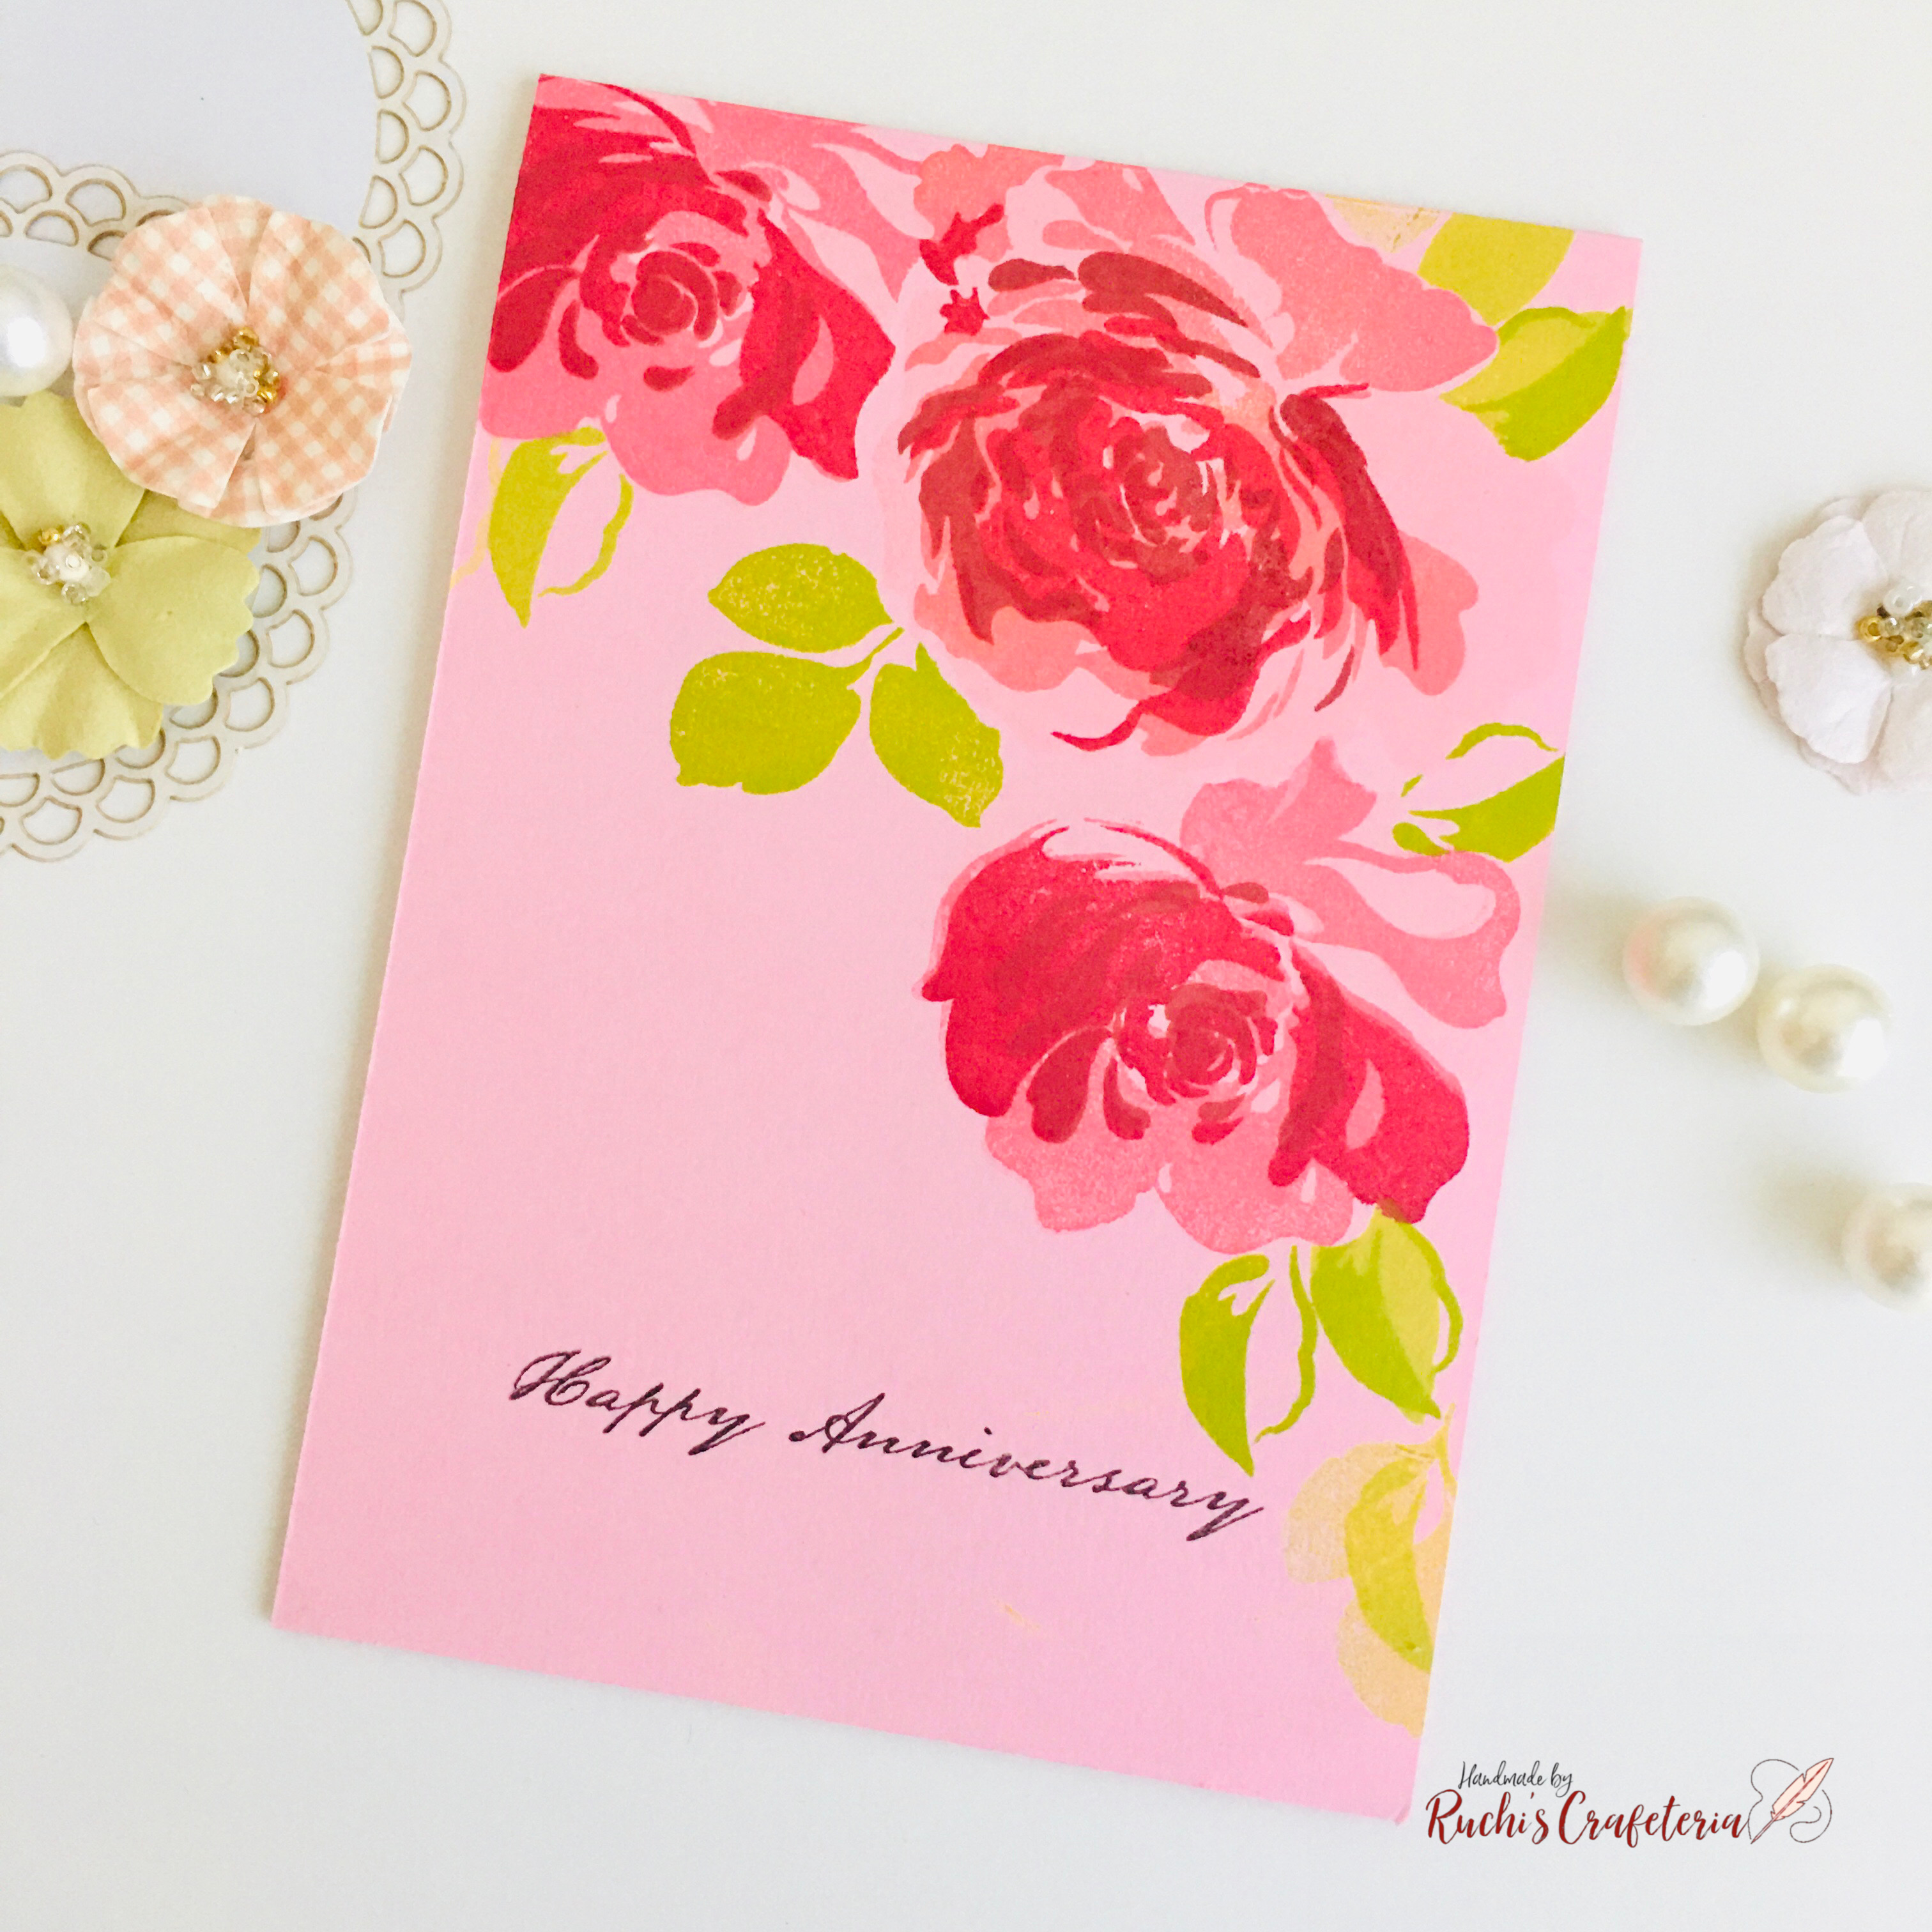
Card- Happy Birthday 


For this card, I’ve heat embossed some abstract designs on the card base using a stencil and then distressed it with Mango Smoothie Altenew ink. Adhered layered and fussy cut peonies & leaves. I used foam tape to some flowers to give dimension to my card.
I’m liking the bold yet subtle look of this card 💗💛💗

Altenew Supplies:
🌸 Peony Bouquet stamp
🌸 Persian Motifs stamp
🌸 Inks- Cotton Candy, Peach Perfect, Caramel Toffee, Paper Bag, Mango Smoothie, Green Fields, Jet Black
🌸 Other supplies- foam tape, Dress My Craft- blending brush, brown cardstock & sequins, MUDRA stencil, Wow white embossing powder, versamark embossing ink, Neenah white cardstock, heat gun, and basic cardmaking tools
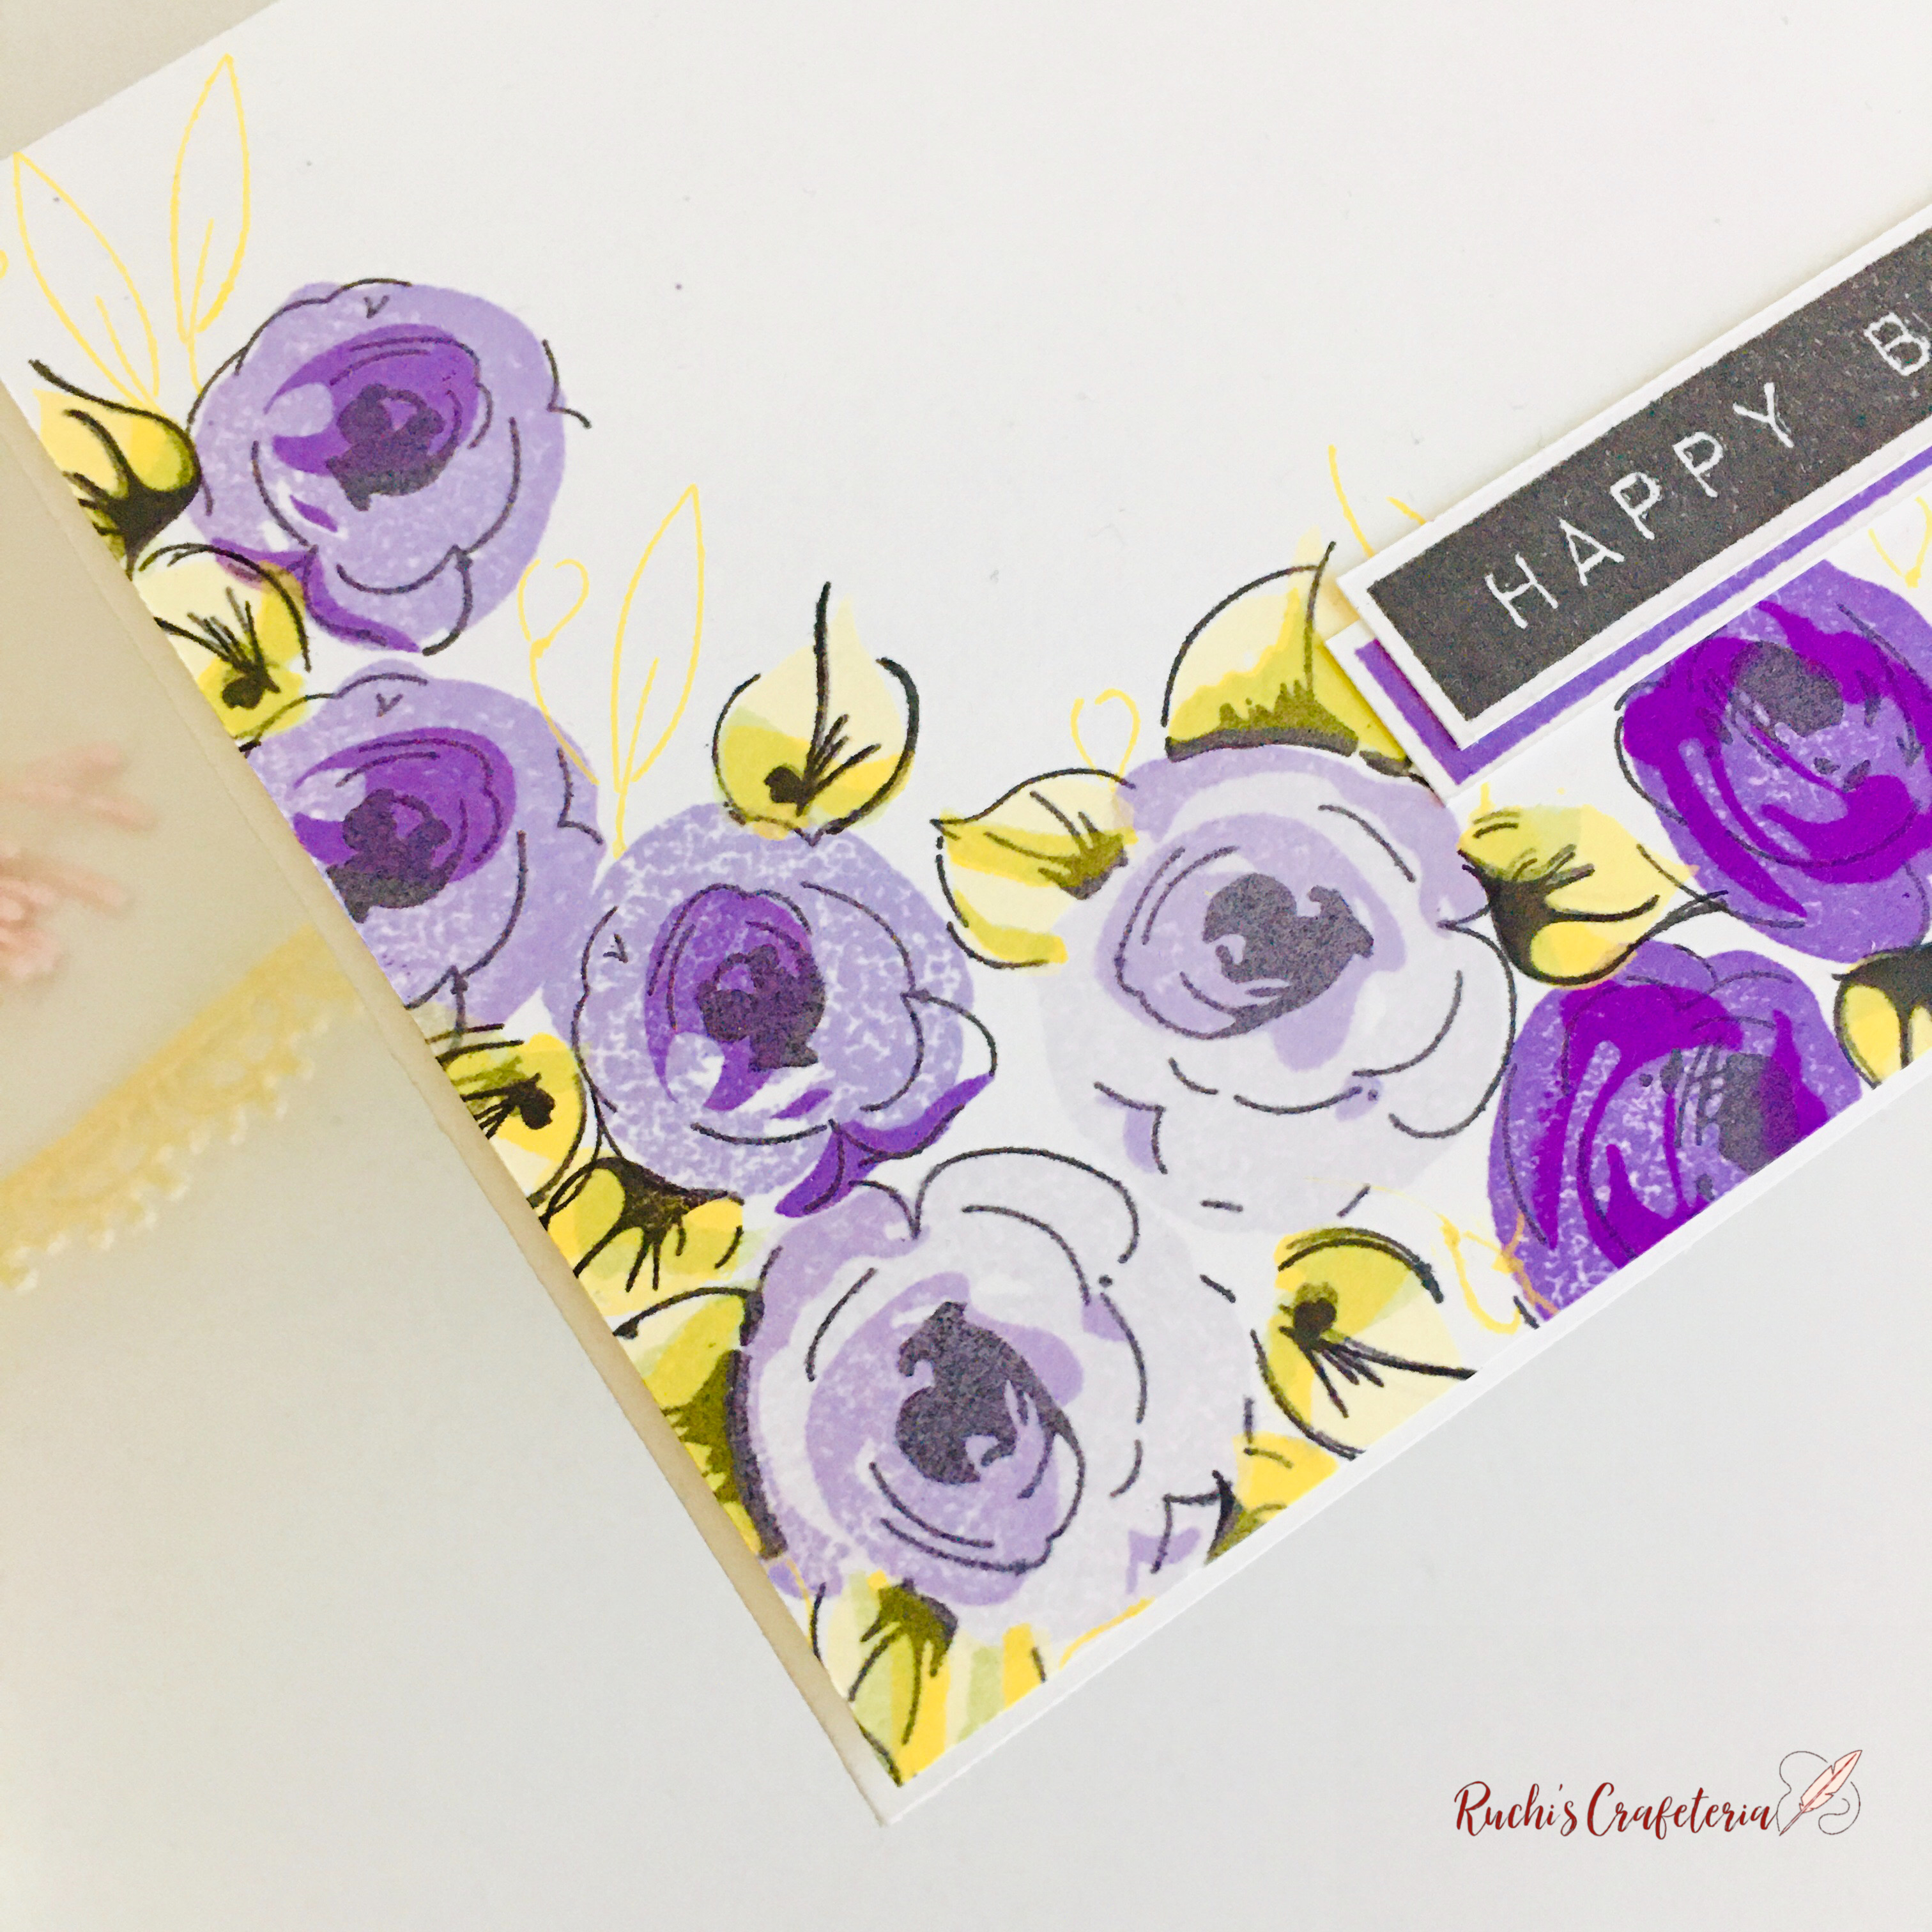
Card 2- Shades of Blue


For this card, chose big flowers and shades of blue. Picked blue cardstock for my base and did some layered stamping in a faded look. Just wanted to create a background of big flowers so did stamping imperfectly. Competed for the look by adding a sentiment on a white stripe.

Altenew supplies:
💙 Hope stamp
💙 Inks- Desert Night, Dusk, Ocean Waves, Sapphire, Jet Black, Bamboo, Parrot, Olive, Grapevine
💙 Other supplies- Mustard Seed & Wild Honey distress inks, Dress My Craft sequins, blue cardstock
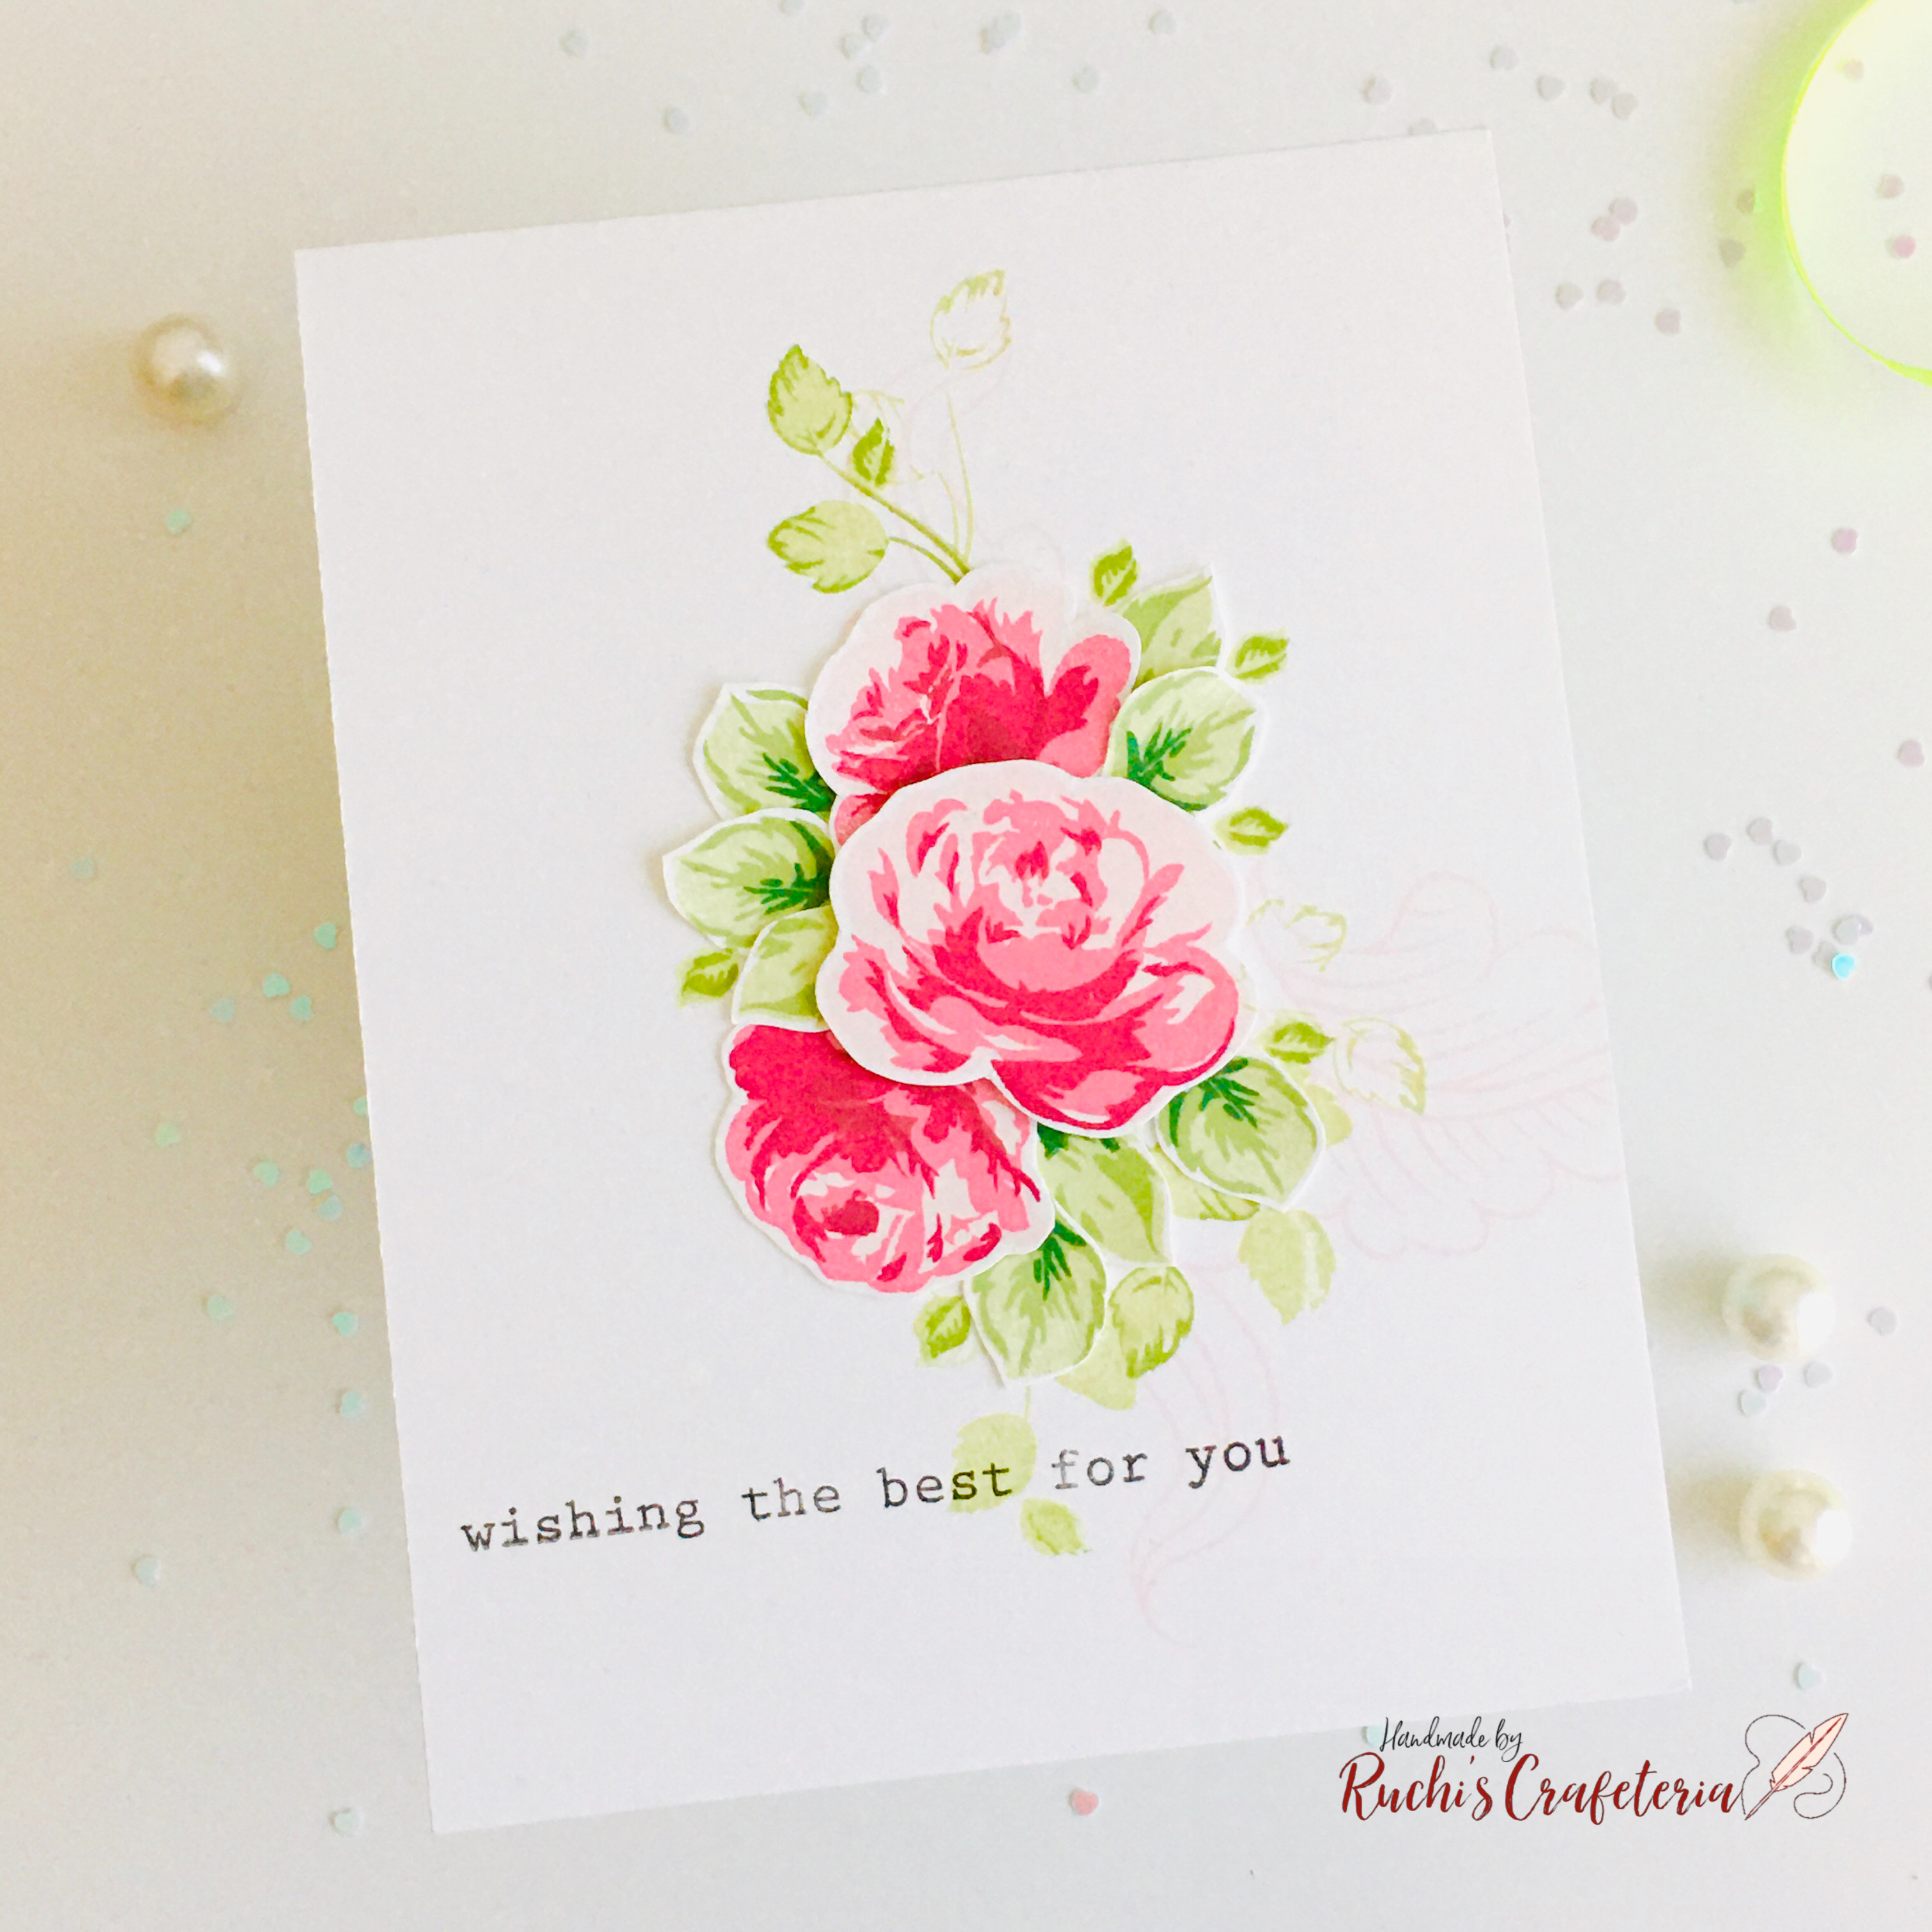
Card 3- You Are


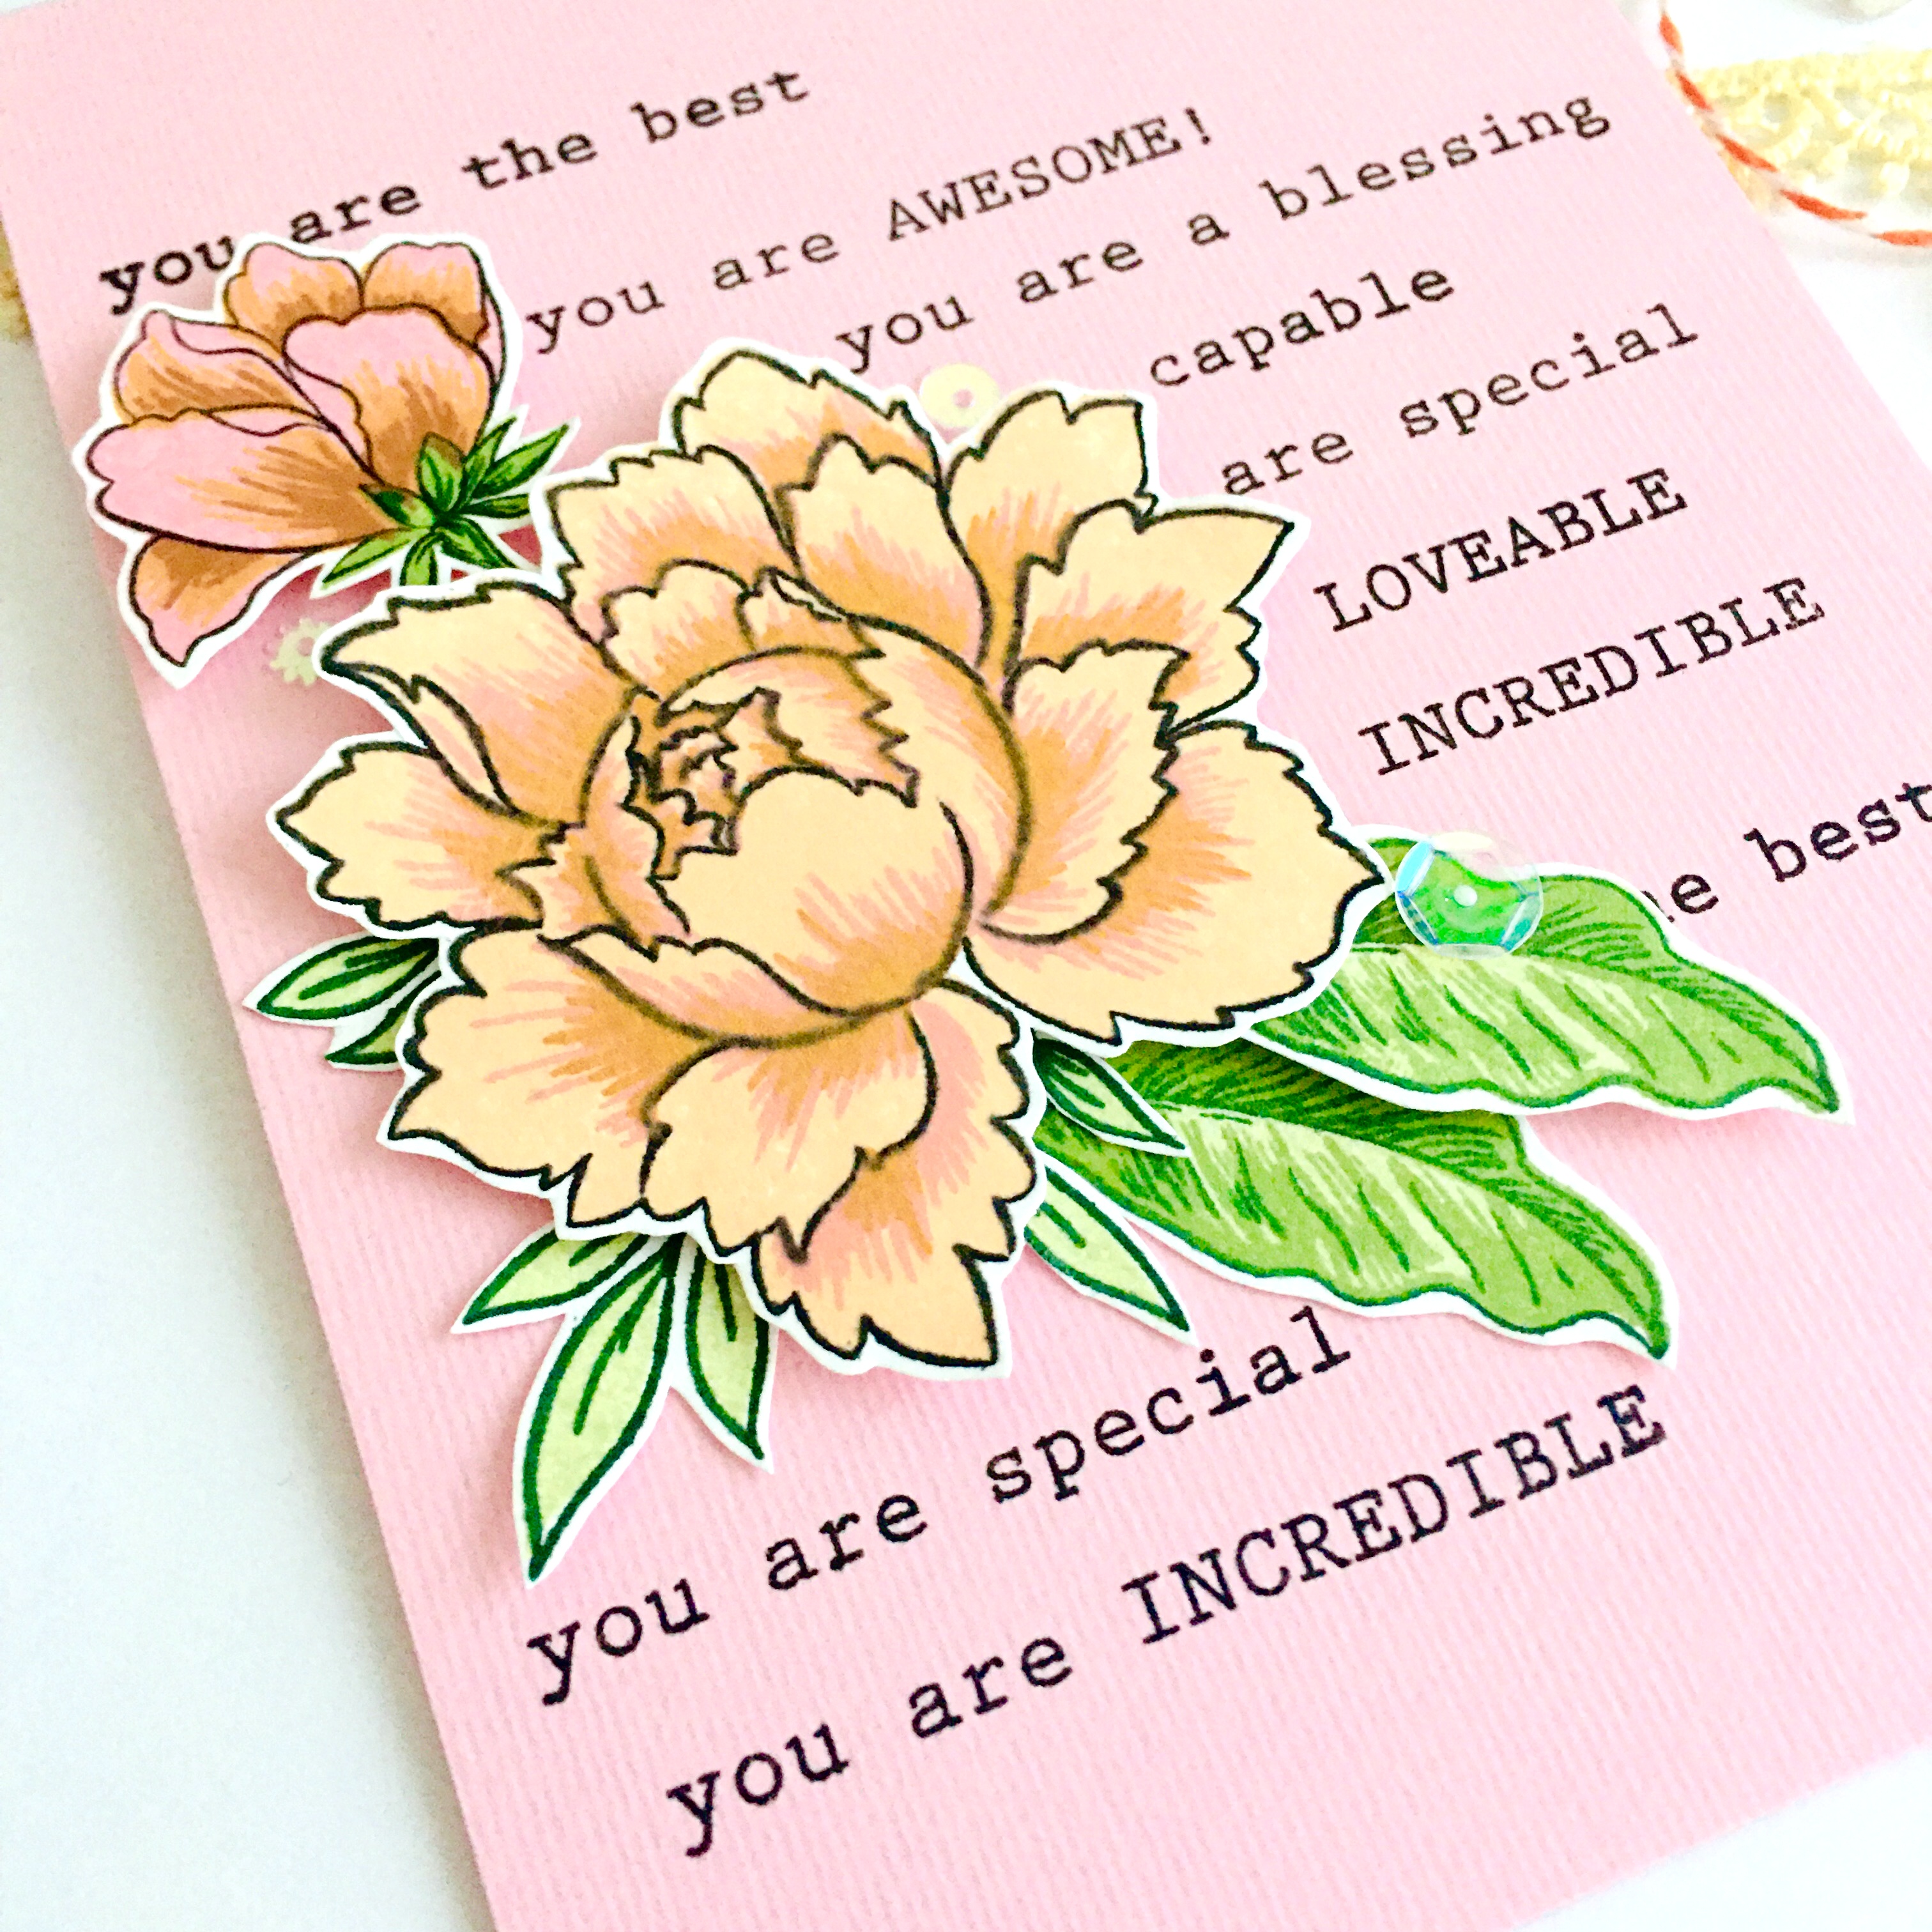
For this card, I’ve created the background on pink cardstock with sentiments. Adhered layered and fussy cut peonies & leaves. I used foam tape for some flowers to give dimension to my card.
Really liked this idea of sentimental background 💡 Surely gonna create a video tutorial of the same in the coming days so keep an eye on my YouTube Channel 😊
Altenew supplies -
💗 Peony Bouquet stamp
💗 You Are stamp
💗 Inks- Cotton Candy, Peach Perfect, Caramel Toffee, Paper Bag, Green Fields, Jet Black
💗 Other supplies- foam tape, pink cardstock, and basic cardmaking tools

Floral Bookmarks


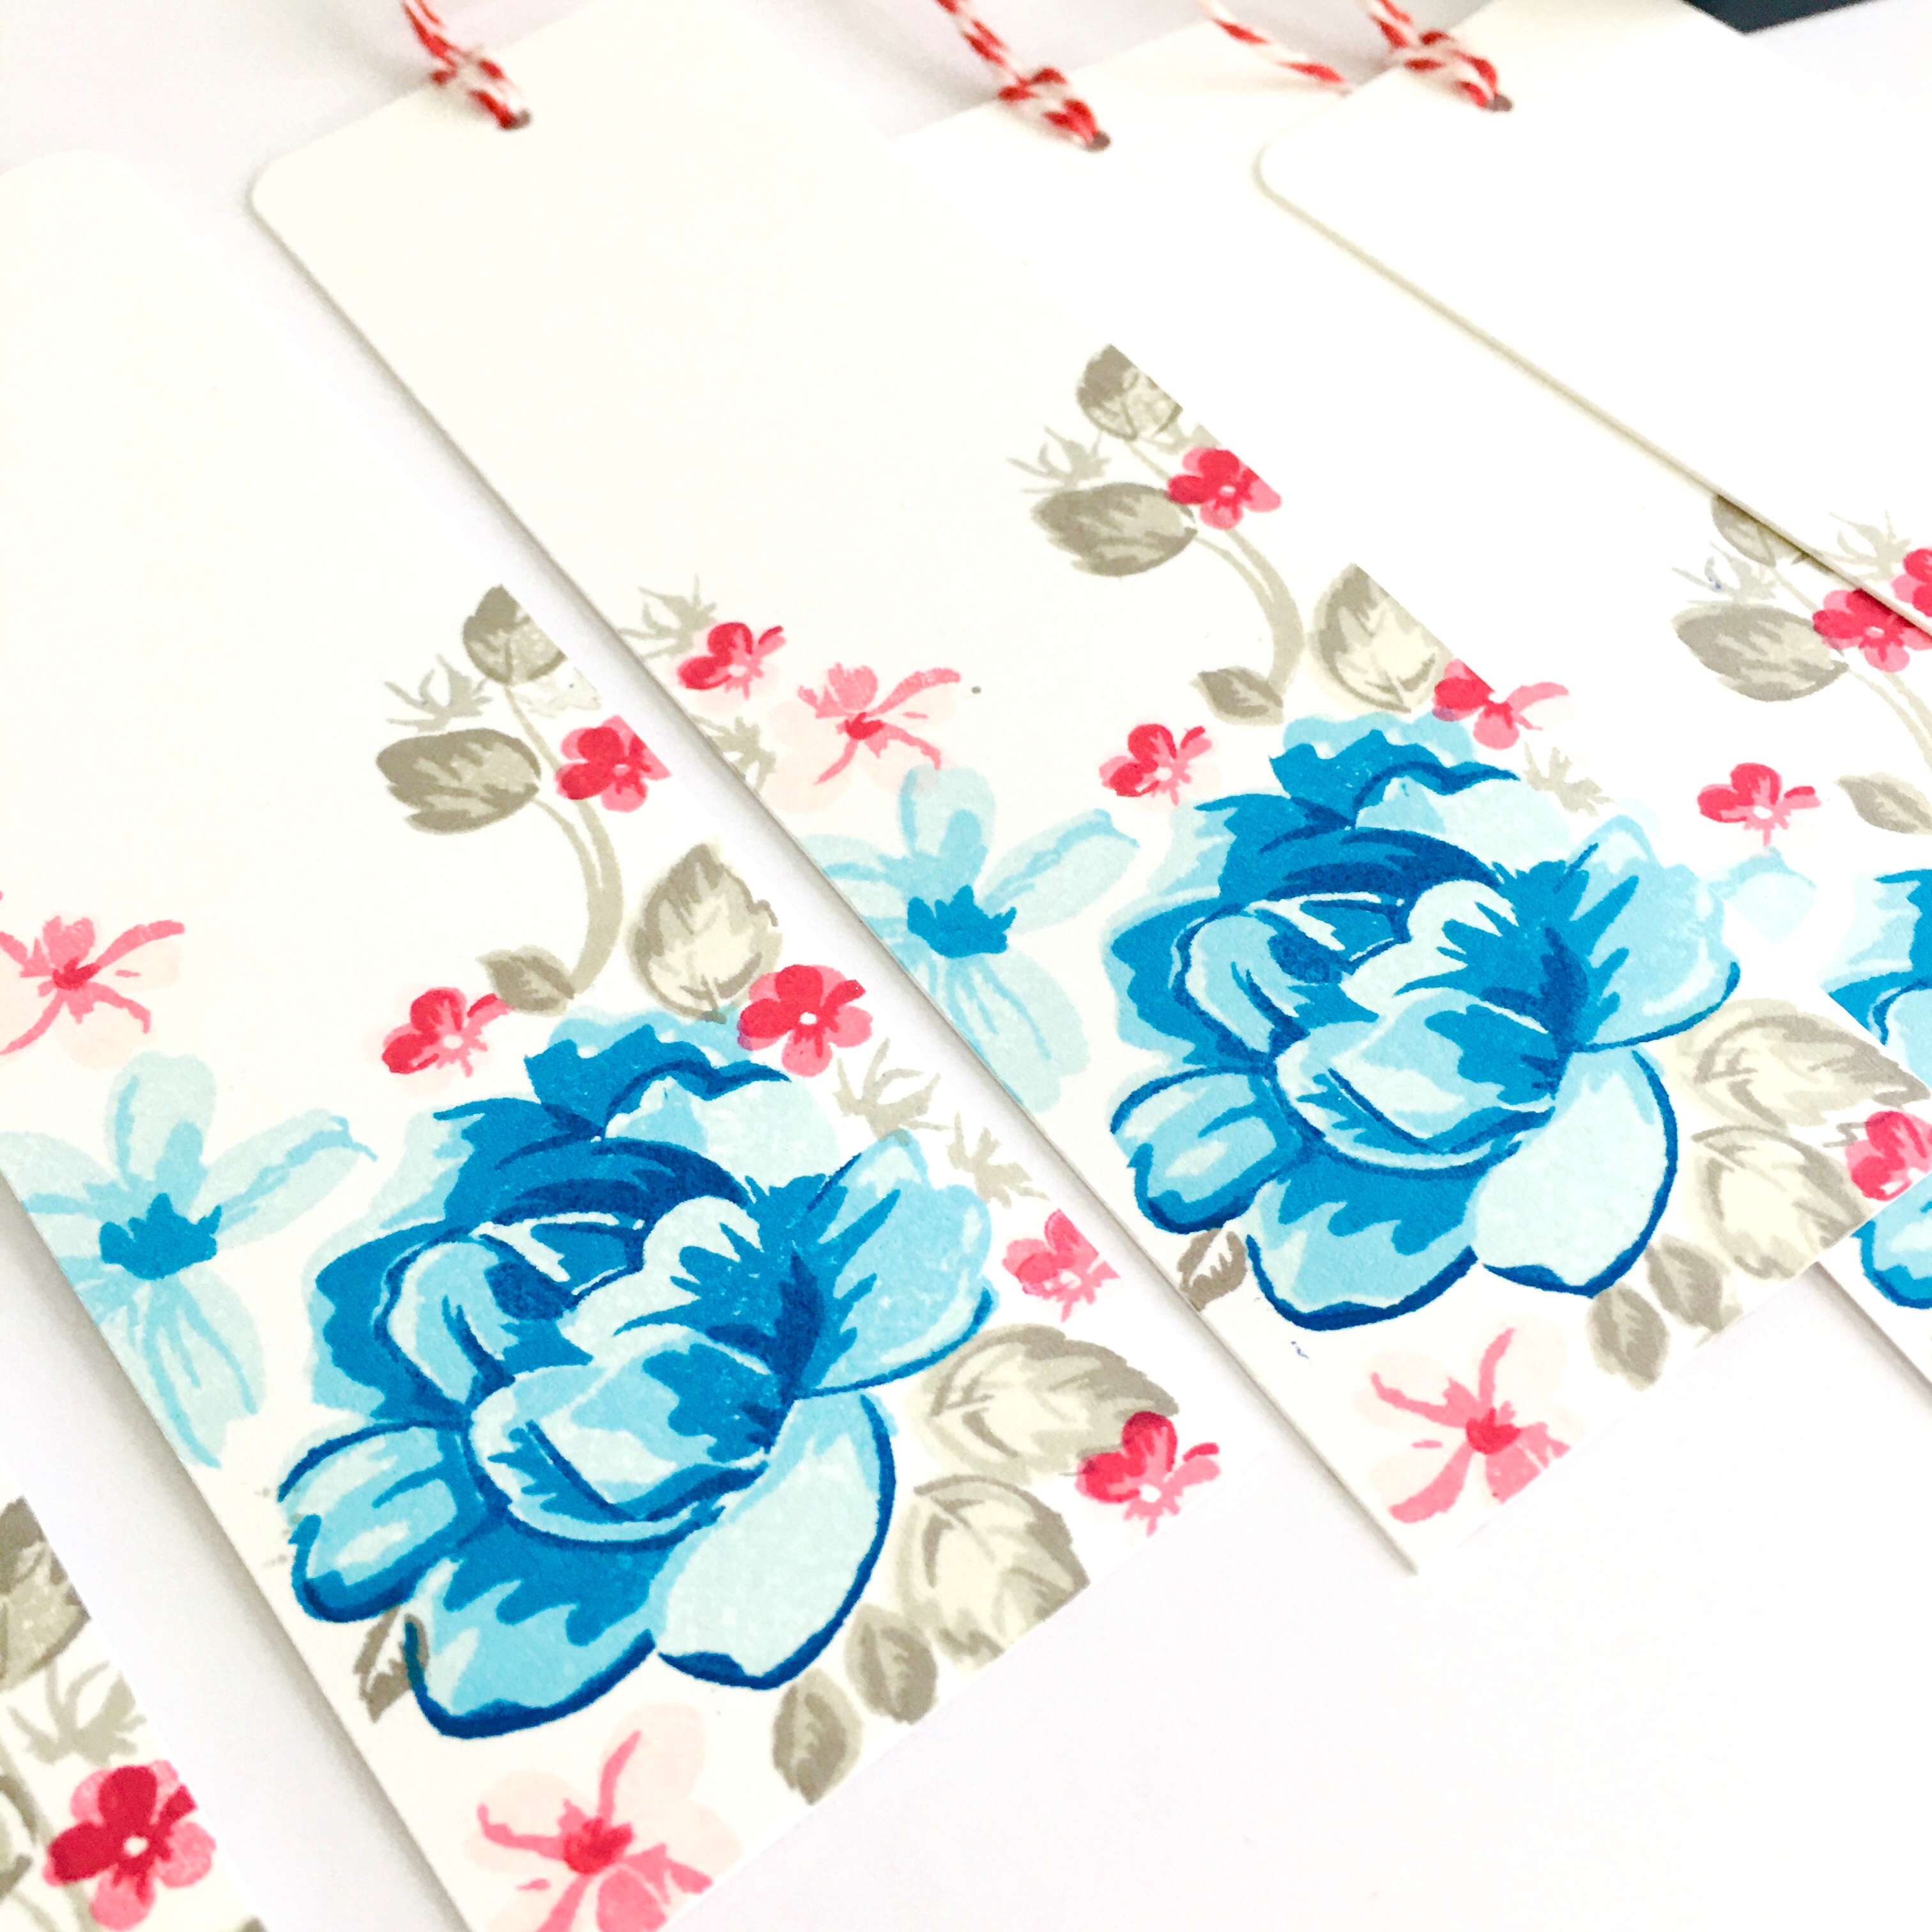
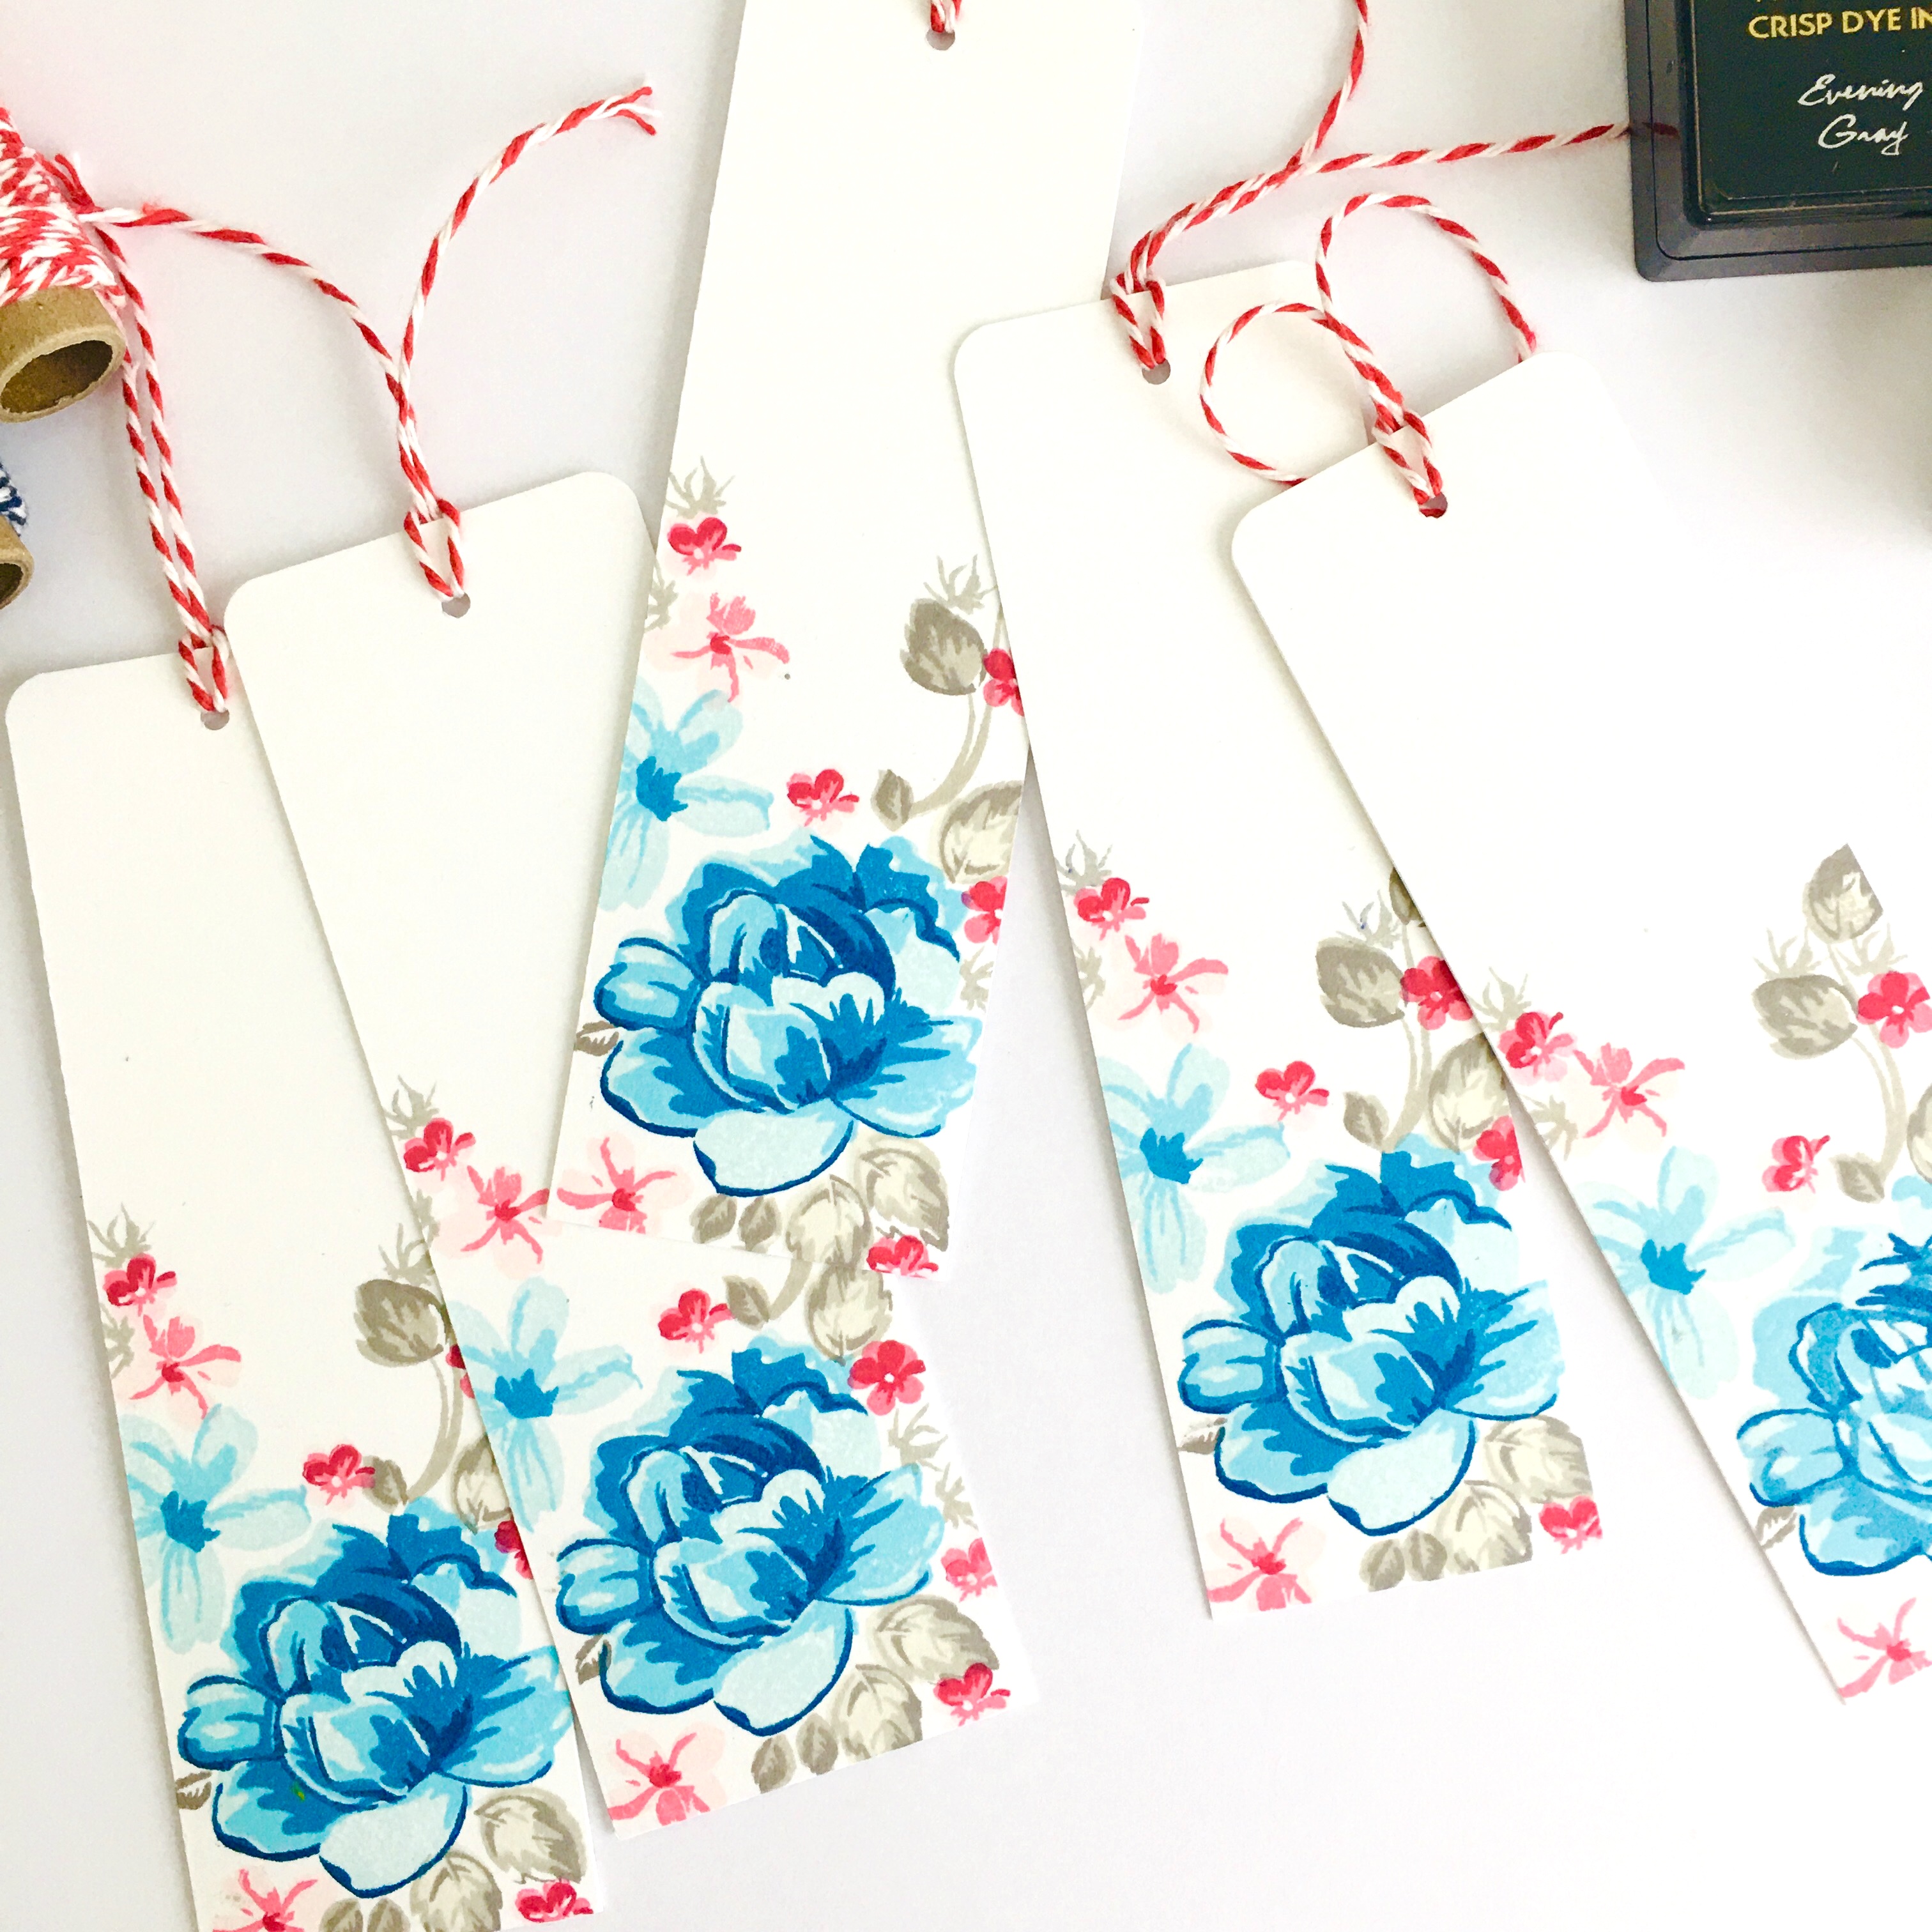
This is one project which I’ve enjoyed the most 😃 Love doing layered stamping in different shades. I’ve gifted all the bookmarks to my county library and they liked them all 🥰

Altenew supplies-
🔖 Vintage Flowers stamp
🔖 Vintage Roses stamp
🔖 Inks- Secret Garden, Red Cosmos, Butter Cream, Warm Sunshine, Caramel Toffee, Cool Summer Night, Warm Gray

I hope you like today’s cards with layering techniques. I had so much fun creating these cards with Altenew layered stamps.


That’s it for today. I will come up with more cards for my next class of AECP
Till then…Happy crafting!
Ruchi

Thursday, August 18, 2022

MIXED MEDIA CANVAS DISPLAY ‘THE BEST RESTAURANT’

Hey there!

I’ve created a Mixed Media Canvas using the Dress My Craft Eternal Love Paper collection and various dies. Eternal Love Motif Sheets have so many elements to Create a perfect eye catchy display for a restaurant or bar to enhance the charm of its interior.


First I’ve created texture using white gesso and Dress My Craft Vintage Script stencil. When it dried created embossed hearts texture using Vintage Hearts stencil and newly launched Gold Embossing Power with the help of Dress My Craft Emboss With Me ink.


Added layers of Dress My Craft Eternal Love papers and its motif sheet elements and some die cuts of recently launched dies like Lacey Butterflies, Mini Envelope, Rose Frame, Feathers, and Vintage Lamps. Embossed some chipboard pieces with White and Gold embossing powders and posted them to my canvas.

All the supplies are listed at the end of this post. Enjoy the new restaurant display to advertise its menu, coffee, organic food, bar & grill.


Dress My Craft Supplies used:

Papers-

Eternal love paper pack

Eternal love motif sheets

Brown family cardstock 

   Tools-

Paper Trimmer

Easy Cuts Machine

Non-stick Craft Mat-thick 

ultimate-die-cleaning-tool

Fine and Sharp tip tweezer

Large & Mini funnel trays 

Embossing powder gold & white

Emboss With Me ink

Vintage Script stencil 

Vintage Hearts stencil


Dies-

Lacey Butterflies

Mini Envelope

Rose Frame

Feathers

Vintage Lamps

Cat & Window 

Beads & Sequins-

Micro Sparkling dust 

Say it with hearts sequins 

Flower Pearls- Snow White 


I hope you like today's project.

Happy Crafting!!

Ruchi


Tuesday, August 16, 2022

Layered Cards with Altenew

 Hey there!

Ruchi here and thank you so much for stopping by! I am back to blogging after a while and sharing some cards which I’ve created for Altenew Educator Certification Program (AECP)

I have enrolled in this certification program to learn Cardmaking techniques in detail. Luckily my application got selected and now I’m participating in this and learning new things in each and every class. If you have questions about how to join AECP, then I’m here to help 😊

In this post, I’m sharing a few cards, created for my Altenew Academy Level 1- All About Layering 3 course. Inspired by all the classes which I’ve joined, and sum up a few techniques in my cards. Have a look.

Card 1- Wishing The Best For You 


For this card, I’ve stamped some soft tone elements on the card base and then adhered layered and fussy cut roses & leaves. I used foam tape for some flowers to give dimension to my card.
I‘ve added some leaves in a triangle around my flower cluster and stamped the sentiment just beneath it. I’m liking the soft and subtle look of this card 💖
Altenew Supplies:
🌸 Vintage Roses stamp
🌸 You Are stamp
🌸 Inks- Grapevine, Ruby Red, Coral Berry, Frosty Pink, Evergreen, Forest Glades, Frayed Leaf, Jet Black
Card 2- Hello Gorgeous


For this card, chose big flowers and shades of gray. Picked gray cardstock for my base and did some ink blending. Adhered a die-cut piece (from the same gray cardstock) to add texture and interest to my card. Added some splatter and adhered layered flowers and leaves. Competed the look by adding the sentiment.
Altenew supplies:
🪶 Spring Daisy stamp
🪶 Inks- Desert Night, Dusk, Ocean Waves, Sea Glass, Lava Rock, Moon Rock, Evening Gray, Morning Frost, Jet Black
🪶 Other supplies- Mustard Seed distress ink, Dress My Craft Doily die

Card 3- Happy Birthday


For this card, did layer stamping at the one edge of my cardstock and created this soft-toned cluster. Gave interest to my card by adding a bit dark shade of purple here n there in layering. Stamped the sentiment on a white cardstock using black ink and layered it with a purple stripe. Enjoyed this freehand layered stamping with a versatile Painted Flowers stamp set of Altenew… One of my all-time favorites ✨
Altenew supplies:
💜 Painted Flowers stamp
💜 Label Love stamp
💜 Inks- Midnight Violet, Deep Iris, Lavender Fields, Soft Lilac, Butter Cream, Mango Smoothie, Warm Sunshine, Jet Black, Frayed Leaf

Card 4- Happy Anniversary


It’s a one-layered card with Bold flowers. I kept it simple as I wanted to enjoy the layering fun the most. Liking the print effect of this card 😍 
I like to create one-layer cards with Altenew floral stamps as they are super easy to use and if your layering goes wrong, flowers still look pretty. You won’t be disappointed with the result 🤘🏻 Altenew supplies:
🌺 Floral Fantasy stamp
🌺 Vintage Roses stamp
🌺 Inks- Grapevine, Ruby Red, Coral Berry, Frosty Pink, Jet Black, Parrot, Bamboo
I hope you like today’s cards with layering techniques. I had so much fun creating these cards with Altenew layered stamps.


That’s it for today. I will come up with more cards for my next class of AECP
Till then…Happy crafting!
Ruchi


Video Tutorial: Love Shaker Card

 Hey there!

Today I’m sharing a video procedure of this love card in Shabby Chic style.


Enjoy the video HERE on my YouTube channel. Don't forget to subscribe and follow my blog.

Thank you for stopping by!
Ruchi

Layered Cards with Altenew

  Hey there! Ruchi here and thank you so much for stopping by! I am back to blogging after a while and sharing some cards which I’ve create...